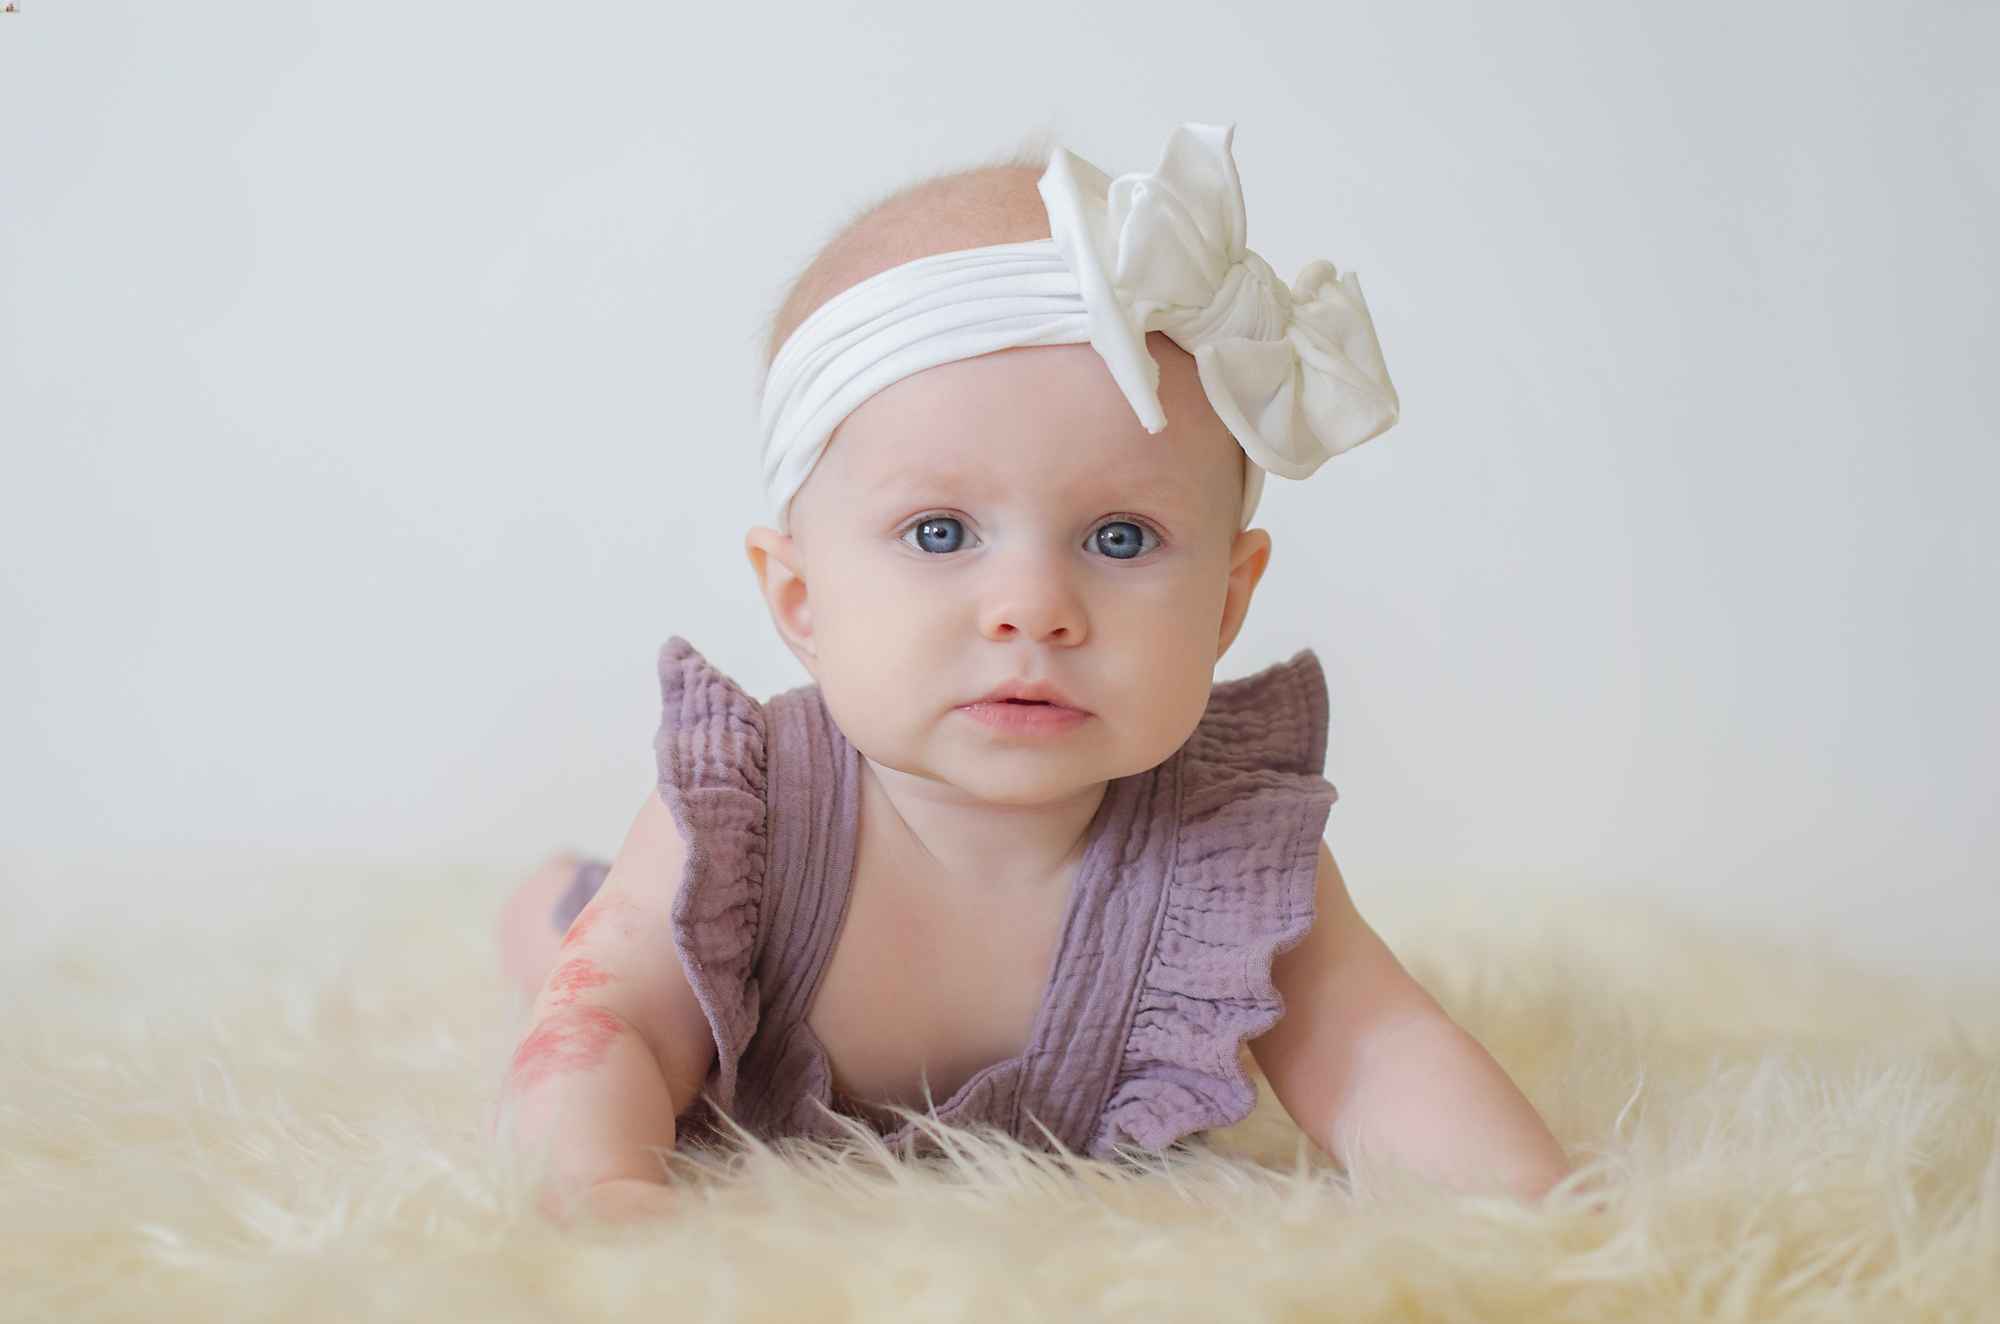

Learn how to make headbands for babies in this easy to follow article.
There are a lot of headbands for babies that you can buy in stores or purchase online. But sometimes, all of us want to make something creative and be proud of the final result. If you want to try a DIY baby headband and own a fabric that you think will look great on your baby, continue reading.
This simple article will show you how to make headbands for babies. This style of the baby headband can be readily adjusted in size. So, choose from three dimensions to create a beautiful baby accessory in no time!

Safety First
Before starting, we have to warn you to think about safety first. Since babies put everything in their mouths, the headband will end up there too. So, remember not to add any beads, buttons, flowers, sparkles, or other tiny items that can be choking hazards for the baby.
If you’ve already decided on a headband with tiny details, make sure to use it only when the baby is in sight of an adult because a child under the age of three shouldn’t be left alone with that kind of headband on.
Easy to Make: Step by Step Project
This is a fantastic project to start if you’ve never stitched with fabric before. With our step-by-step guide, we’ll show you how to make an easy, quick, and cute baby headband. It doesn’t matter if you don’t have a serger because this baby knot headband can be made using a home sewing machine.
Needed supplies
- Knit fabric with the following measures: 22″ x 5″ (56 x 12 cm) for the smallest size, 26″ x 5″ (66 x 12 cm) for the largest size
- Sewing thread with a similar color to the fabric
- Sewing machine (or serger)
- Ballpoint needle
- Scissors, pins, and iron
The finished sizes of this DIY baby headband
- For Small size baby headband (56 x 6 cm): cut (2 pieces) 22″ x 2 ½”
- For Medium size baby headband (61 x 6 cm): cut (2 pieces) 24″ x 2 ½”
- For Large size baby headband (66 x 6 cm): cut (2 pieces) 26″ x 2 ½”
Dimension Chart for Baby Headband
| Size | Headband size (unstretched) | Age |
| Small | 14-15’’ (35-38 cm) | newborn |
| Medium | 16-17’’ (40-44) | 6 months |
| Large | 19-20’’ (48-51) | 1 year |
Finished sizes
If it’s possible, measure your baby’s head circumference to ensure that the size is correct. The positive side is that this kind of baby headband may always be adjusted when tying the knot, which is why we choose these headbands for babies over other fixed designs.
The fit also depends on the stretch of the fabric you chose. It’s best to choose a 50 percent – 4-way stretch knit, an easy-to-work-with fabric.

How to Make Headbands for Babies
Step 1
Fold your piece of fabric in half with the right sides facing out. With this method, you’ll have your two strips ready to stitch as soon as you cut them – cutting both simultaneously: so cut two 22″/or 24″/or 26″ by 2 12″ strips while the width is the same for all sizes.
Cut a 1″ by 1″ triangular off each end to make pointed ends. This is the most straightforward technique to keep the headband ends from becoming too bulky once it’s on the baby’s head. Also, this is the quickest and easiest way to get nice rounded and slightly pointed ends for the headband knot – it always works!
Step 2
Sew across the edges of the pieces with the right sides together, leaving a few inches unsewn on one of the two long edges for turning. When sewing the headband edges, you don’t need to sew straight lines; it’s better to just go for a slight curvature.
Important: on your sewing machine, use a stretch stitch; a tiny zig-zag will suffice! Stitch width 3 and stitch length 2 were the settings on my machine.
Step 3
Trim the seam allowance corners to remove excess bulk. Once turned, this will make your product look neater.
Step 4
Turn your headband right-side out through the opening. First, push out one side, then do the same with the other ‘tail’ once it’s turned. Then sew the opening shut with a quick, narrow zigzag stitch. You can also hand-stitch; the ladder stitch is always the finest in this instance!
Step 5
Give your baby headband a final press with the iron to ensure it’s nice and flat.
Step 6
If you have your baby nearby and awake, model against the baby’s head first, then tie, so you know the knot is exactly where it should be. However, you may always untie and alter the knot.
No Sewing Headband
If you are not that experienced with needles and threads, you can always make a no-sew headband. One alternative way is by using a hot glue gun. You can find many step-by-step tutorials on YouTube that will help you create a stylish headband without sewing.
Another way that doesn’t involve sewing is by cutting a strip of knitted fabric and attaching the ends with double-sided fabric tape. The great thing is that knit fabric won’t fray.
Crochet and Knitted Headbands
Crocheting and knitting are other ways to create soft and trendy headbands for your baby. If you already have all the necessary tools, you’ll need just a bit of guidance. You can find a lot of helpful online guides on YouTube or Pinterest that will show you exactly how to make headbands for babies.
Read More: How to Make a Bow and Arrows for Kids
Conclusion
Some wear headbands for a stylish look, others for functional purposes, but no doubt it’s one of the hair accessories that have never gone out of style. They look incredibly adorable on babies, and the parents love them.
Since baby headbands don’t take a lot of fabric to make, and you don’t even have to be a professional in sewing, you can create one easily.
We hope the guide in this article helped you learn how to make headbands for babies. Just remember, whenever it comes to babies, safety comes first.